In few months we will get the new release of Drupal the #8 (I hope) and I think it’s time to start to test, learn and write about the new ways we have in Drupal 8 to do our old tricks.
Today I want to talk about the Drupal 8 Initiative Configuration Management, this initiative pretends to facilitate the process of pass Site Building stuff from Dev environments to Production.
As you can imagine this feature will be a replacement for Drupal Features and if you don’t use or don’t like Features also will be a replacement for Drupal Bundle Copy
Installing Drupal 8
Right now there isn’t an official Drupal release for Drupal 8, but if you can start to test you can get directly from the git repository.
If you don’t have plans to contribute with code to Drupal 8 you can use the following command to get just the latest version of Drupal 8 but without the whole git history reducing dramatically the download process.
git clone -depth 1 --branch 8.0.x\
 http://git.drupal.org/project/drupal.git [FOLDER_NAME]
After that, you just need to create a Database and point your web server to this folder and start the installation in the same way you usually do for Drupal 7.
Configuration Management Install
You don’t need install Configuration Management module, because is part of Drupal 8 Core and is already installed when you complete a standard Drupal 8 installation, as you can see in the following image.

As you can imagine, you can’t disable the Configuration Management module.
Export Configuration
As I said at the beginning Configuration Management is a replacement for Features, so you need to work in your website doing Site Building tasks like creating or modifying content types and other tasks like creating Views(part of Drupal 8 Core).
Now we will call the first Drupal 8 Installation Devel#1 of a new Drupal 8 project and as you can imagine we need to share our progress with the rest of team and to avoid to create a DB Dump and force the rest of the team import we will use the Configuration Management.
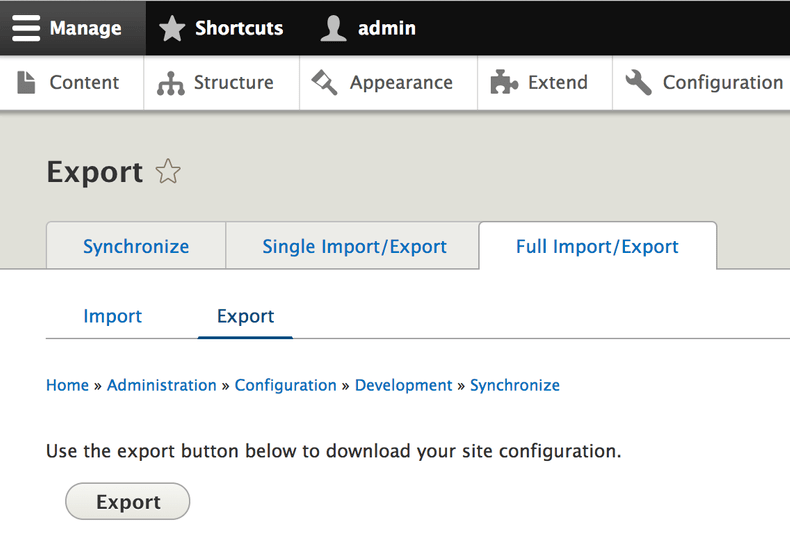
The administrator of Devel#1 has to go page: example.com/admin/config/development/configuration/full/export the UI will look similar to the image below.

After press the button Export you will get a zip file named config.tar.gz, after you uncompress the zip file you will get a config folder with several files in YAML format and each one represents an isolated piece of the configuration of our site. Below you can a partial list of files created by export.
block.block.bartik_footer.yml       menu.entity.node.page.yml
block.block.bartik_help.yml       menu_link.static.overrides.yml
block.block.bartik_login.yml        menu_ui.settings.yml
block.block.bartik_powered.yml        node.settings.yml
block.block.bartik_search.yml       node.type.article.yml
block.block.bartik_tools.yml        node.type.book.yml
block.block.seven_breadcrumbs.yml     node.type.page.yml
block.block.seven_content.yml       rdf.mapping.comment.comment.yml
block.block.seven_help.yml        rdf.mapping.node.article.yml
Now we have the options to share all files or just one of them with the rest of the team.
Importing Configuration
Now we have the files required to import the configuration in other Drupal installation Devel#2 but we need to prepare the destination.
The Drupal 8 installation process create two folders to handle the import and export process, the installer creates two folders inside
Let me show you an example of that configuration file:
$settings['install_profile']= 'standard';
$config_directories['active']= 'sites/enzo/files/config_HASH/active';
$config_directories['staging']= 'sites/enzo/files/config_HASH/staging';
As you can see now we have two concepts active and staging.
The active folder must contain the current site configuration, but by default is empty because the default storage for current site is Database but is a possible change I will write about that in other blog entry.
The staging folder contains any configuration we want to import in our site, here we must copy the files we get from the export process.
I recommend using a version system like GIT to control the staging files and change the configuration to use a non-hash folder name, check my recommendation below:
$settings['install_profile'] = 'standard';
$config_directories['active'] = 'sites/enzo/files/config_HASH/active';
$config_directories['staging'] = 'sites/default/config/staging';
Is required your web server have permissions to read the configuration files, for instance, if _www is the user running your web server you must run the following commands:
$ sudo chown -R _www sites/default/config/staging/
$ sudo chmod -R 755 sites/default/config/staging/
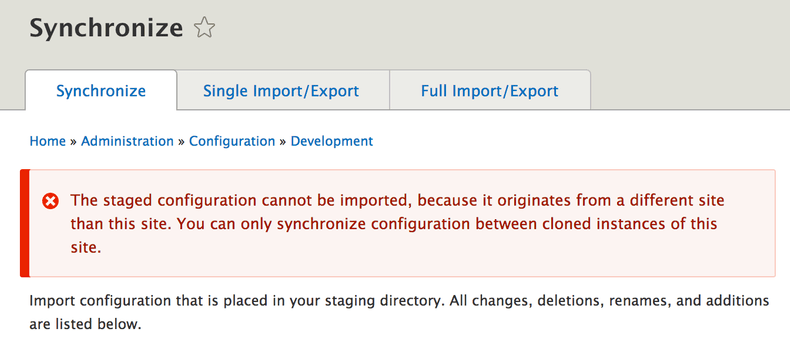
Until here all looks OK, but If you go to the page example.com/admin/config/development/configuration you will get the following error

We will solve this issue in next section.
Force Site UUID match
The Configuration Management only allows sync configuration between same site or project to avoid issues importing configuration from site a.com to b.com, to accomplish this validation Drupal 8 generate a UUID for each site.
You cat get your current site UUDI executing the following command
$ drush cget system.siteThe command above we will have a similar output to next listing
uuid: 236fa77c-d83e-42de-8a03-03c574c00160
name: backend.com
mail: enzo@enzolutions.com
slogan: ''
page:
  403: ''
  404: ''
  front: node
admin_compact_mode: false
weight_select_max: 100
langcode: en
The config import has a different UUID, you can confirm the UID with the following command
$ cat sites/default/config/staging/system.site.ymlFor that reason you need to change the value of Site UUID using the following Drush command:
$ drush cedit system.siteThe command above enables you to use your favorite text editor to set the same UUID present in staging config files.
Run Sync
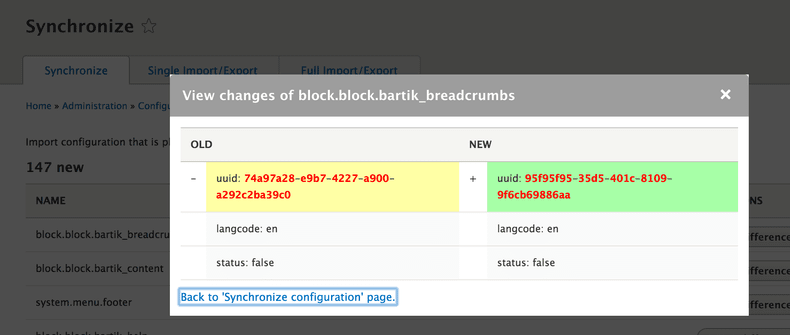
After changing the UUID and change the permissions, if you visit again the page example.com/admin/config/development/configuration you will see all changes, deletions, renames, and additions as you can see in the following image:

You can review the differences and remove some files from staging folder if you are not happy with the result and finally execute the Import All process.
If you are a Drush lover you still can run this process with Drush with the following command:
$ drush config-import stagingAfter complete the import, you have now site sync.
I hope you have found this article useful.